
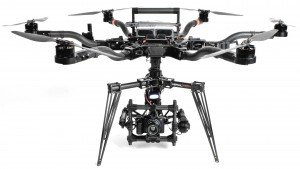


Top Tips Drone Flying with FLIR Camera
Drone filming with FLIR cameras is an amazing use of drones and if done properly the results are amazing. Aerialworx have been flying FLIR cameras since 2019.
Drone pilot Stefanie Williams from Aerialworx has been flying FLIR cameras for over 4 years for projects such as Hunted, Celebrity Hunted, The Heist and Stephen Hawking Genius. With over 30 years flying experience, she has a passion for flying and has a natural talent for flying a variety of drones with unique cargo at unique locations. Here she talks about top tips for operating a drone with a FLIR camera mounted.
Read Stef’s top tips for flying a drone with a FLIR camera.
Utilizing a FLIR camera on a drone opens up a world of possibilities for capturing high-quality thermal imagery from an aerial perspective. To make the most of this powerful combination, it is important to follow certain guidelines and best practices. Here are some of my top tips for drone flying with a FLIR camera.
- Drone Compatibility: Ensure that your drone is compatible with the FLIR camera. Check for compatibility requirements and specifications provided by both the drone manufacturer and FLIR. You will need to make sure that the camera has a method for you to stream the image to the ground as a minimum and remote shutter control as a bonus. I regularly fly FLIR cameras for everything from on-set thermal imaging for spy drones to surveys and engineering projects. For my own personal projects, I have built a custom drone and gimbal which allow me to fly virtually any FLIR camera for up to 30 minutes.
- Camera Integration: Mount the FLIR camera securely onto your drone according to the manufacturer’s instructions. It is crucial to ensure proper balance and stability for safe and reliable operation. If you do have a gimbal this is the preferred mounting solution as it inhibits vibration and provides the best possible results.
- Power Supply: Connect the camera to a suitable power source on the drone. Verify that the power supply is adequate to support both the drone’s flight and the camera’s continuous operation. For the more powerful and demanding cameras, I quite often fly with the FLIR camera’s integrated battery, but this can add considerable weight, so make sure you have a solution which works with the weight capacity of your drone. On occasions, I’ve also created a DTAP cable to power the camera from the on-board power supply of a professional gimbal.
- Camera Settings: Familiarise yourself with the camera’s settings and features. Adjust the desired parameters such as image resolution, frame rate, temperature range, color palettes, and image enhancement options to suit your specific application.
- Image/Video Downlink: You will need some reference image on the ground, so make sure you have a method to get the camera image to the ground. I personally use a HD downlink, so that I get a real time HD image on the ground, which I then stream to a 19 inch production monitor.
- Shutter Control: You will also need some way to remotely control the shutter release of the camera to take a photo or start / stop recording of thermal video. Again, this is a personal preference. I’ve used both remote shutter cables and alternative methods such as Timelapse in the past. Both methods work very well.
- Pre-flight Check: Before every flight, perform a thorough pre-flight check. Ensure that the camera is functioning correctly, the lens is clean and free of obstructions, and the camera’s firmware is up to date. Make sure that your downlink is functioning and that your shutter control is working.
- Flight Planning: Plan your flight route considering the intended imaging objectives. Identify the areas or subjects of interest, taking into account the desired altitude, speed, and angles for optimal thermal imaging.
- Flight Execution: Take off and ascend to the desired altitude, maintaining a stable flight. Use the live feed from the FLIR camera to monitor the thermal imagery in real-time. Adjust the camera’s pitch, roll, and yaw if necessary to capture the desired thermal data.
- Image Capture: Trigger the camera to capture images or record video at appropriate intervals or continuously based on your requirements. Take into consideration factors like image overlap, distance from the target, and flight speed to ensure comprehensive thermal coverage.
- Post-processing and Analysis: Once the flight is complete, download the captured thermal imagery and analyze it using suitable software or FLIR’s proprietary analysis tools. Conduct detailed inspections, temperature measurements, or other desired analysis techniques to extract valuable insights from the thermal data.
- Safety First: Prioritize safety throughout the entire process. Adhere to local regulations, fly within legal boundaries, maintain visual line-of-sight with the drone, and be mindful of any potential hazards in the operating environment.
Insurance
Make sure your drone insurance covers you for operating with a thermal camera. Many drone insurance companies may charge an additional premium for this type of camera and also if the flight proposes additional risk.
Don’t Panic
Above everything, be confident, calm and professional at all times and capture those amazing shots that you didn’t think were possible. Enjoy and I hope this check list has been helpful.
If you have any comments or feel I have left something out, please feel free to send me an email.
Stef x
Our caves
- FLIR T1020
- FLIR T1030
- DJI H20T
- FLIR XT


